Short version: in a hurricane the dish is rarely the thing that decides whether you stay online - the mount is, and a mount has no published wind rating at all. The 170 mph figure quoted in every storm-week article belongs to SpaceX's flat high-performance terminal, not to the residential dish on your roof. So the useful question is not "is my dish rated for this" but "do I take it down". Above roughly 60 mph of forecast sustained wind the answer is yes: dish and mast off, through-bolted plate stays. Below that, leave it, and inspect it afterwards as if it had been loaded - because it has.
That advice is cheap to give and rarely given, because most Starlink weather pages are written by people selling data plans rather than hardware. This one is written by people who sell the bracket, so it is going to be unusually blunt about what a bracket can and cannot do - including the parts that make our own product look ordinary.
The 170 mph figure is not about your dish
The number has a real origin, and it is not the standard kit. During Hurricane Ian in September 2022, asked about storm performance, Elon Musk cited the flat high-performance terminal - the rectangular marine unit - as "rated for 280+ kph (174+ mph) winds". In the same news cycle, hardware reporters noted that the standard residential dish's wind endurance simply was not listed on Starlink's own specification page. One product's figure was borrowed for another, and it has been repeated every hurricane season since.
What is defensible today is narrower. SpaceX's specification page does print a survivable-wind figure for the Performance-class kits. For the standard residential dish the number has moved between hardware generations and at times has not been published at all, and the figures that circulate in its place disagree by a factor of two: about 60 mph "operational" in one installer's reading, 110 km/h operational with 160 km/h survival for the Gen 2 rectangle in another, and owner reports of standard dishes riding out 130-145 km/h in a third. Those cannot all be right, and none of them is a document you can point at.
Which produces the only honest instruction available: open the specification page for the exact kit you own and see whether a wind number is printed there. If it is not, you do not have a rating. You have a dish that has survived other people's storms, which is not the same thing and is not something to plan a hurricane around. Numbers in this corner of the internet rot quickly; treat any figure in any article, including this one, as a prompt to go and check the source.
| Part of the install | Published wind rating | What that means in storm week |
|---|---|---|
| Standard residential dish | No consistent published figure; it has changed between generations and been absent at times | You are making the decision, not the spec sheet. Plan for take-down rather than for survival. |
| Performance / flat high-performance terminal | Yes - survivable in the 170+ mph class | The most-quoted number online belongs to this hardware, which is not what most people have on a gable. |
| Any third-party mount, ours included | None. Nobody in this market publishes an engineered wind rating | Every bracket is unrated by default. Buy one you can see and reach, and inspect it after the season. |
| Your wall or roof | None | The structure is the real limit, and it is the only part of the list you cannot replace after the storm. |
What actually fails, in order
Three things, ranked by how often they are the cause rather than how dramatic they look.
- The fastener leaves the structure. Not "the bracket bends" - brackets are steel and steel wins. The screws pull out of half-inch sheathing, or out of a fascia board that was trim rather than framing, and the whole assembly goes over. This is the single most common storm failure on a residential install, and it is invisible on a calm day.
- The surface lets go. Lap siding, a gutter hung on spike-and-ferrule, a corner board, a ridge cap. Anything the plate was bolted to that was never carrying load to begin with. You find this one by asking what the fastener is biting, not by how tight it feels.
- The joint rotates. The clamp slips a few degrees, the dish ends up aimed low or sideways, and now the panel presents a worse angle to the wind than the design did. This is also the failure that leaves the dish "working but slow" for months afterwards, and it is the one the misalignment diagnostic exists for.
Notice what is not on the list: the electronics. A Starlink terminal is IP-rated, sealed, and heated; water and salt are maintenance problems, not storm-kill problems. The hardware that dies in a hurricane is the hardware holding it up.
The arithmetic, so you can stop guessing
Wind pressure goes with the square of speed, which is why the difference between a bad afternoon and a named storm is bigger than it feels. At 100 mph (45 m/s) the stagnation pressure is about 26 lb/ft²; a flat plate at an angle has a drag coefficient in the region of 1.2, so call it 30 lb/ft² on the panel face. The standard panel is roughly 0.24 m² (2.6 ft²), presents about 2.2 ft² when tilted, and therefore takes about 70 lb of push. At 130 mph it is roughly 115 lb.
Push is not the problem. The arm is. On an 11 inch bracket, 70 lb becomes about 64 lb·ft of moment at the plate, and 115 lb becomes about 105 lb·ft. A six-anchor plate with roughly four inches between its rows turns that into something in the region of 100 lb of pull on each upper anchor at 130 mph. A #10 screw into half-inch OSB starts giving up around there. The same screw into a rafter does not. These are order-of-magnitude figures with round numbers, not an engineered rating - but the ratio they expose is real, and it is the only ratio that matters: sheathing fails, framing does not.
Run the calculation on your own install and the take-down question answers itself. If the plate's fasteners went into framing, the bracket is the least of your problems and the storm has to be serious before removing the dish buys you anything. If they went into sheathing, an ordinary gale is already asking a lot and the dish should come off early.
Ride it out, strip it, or take everything
"Is it a hurricane" is too coarse a threshold. The useful question is whether the forecast sustained wind gets near a load your fixing was never designed for, which is a lower number than most people assume.
| Forecast | Your mount | What to do |
|---|---|---|
| Gusts under 40 mph | Anything anchored | Nothing. This is what the hardware is for. |
| 40-60 mph sustained | Tripod, ballast, kickstand, RV roof | Dish in. Ballast resists tipping, not sliding, and a bare tripod is fine to leave standing. |
| 40-60 mph sustained | Through-bolted wall or roof | Leave it, then inspect afterwards. This is the range where a sheathing-only install starts to lose. |
| 60-100 mph sustained | Wall or roof into framing | Dish and mast off, plate stays. An hour of work buys the difference between a claim and a story. |
| Over 100 mph, or a hurricane or cyclone warning | Any | Everything off if it unbolts. A bare plate is six holes you already sealed; a dish is a sail. |
| Evacuation order | Any | Dish, cable, power supply and router come with you. The reason you own it is to have it work where you end up. |
Two notes on that table. "Dish and mast off, plate stays" is the row most people miss, and it is the best value in the whole article: a bare plate has almost no windage, every bolt you leave is a hole you do not have to seal twice, and the plate is the expensive part to re-align. And the last row overrides the rest - a dish in the boot of a car on higher ground is worth more than a dish on a wall in a flood zone.
Twenty minutes, in the right order
Order matters more than speed, and each step is there because the earlier one makes it safe or makes the later one cheap.
- Stow it in the app first. A motorised dish moves under power; pulling the plug mid-sweep and then tilting the panel by hand is how gears die. Wait for it to settle, then carry on. There is no hurry at this point that is worth skipping it.
- Power down at the supply, disconnect at the router end. Do not unplug by pulling on the dish end of the cable. The connector is the part that does not enjoy being yanked and the part that costs money to replace.
- Dish off the mast. Either the 1.5 inch thread or the clamp, depending on your mount - both are designed to be undone by hand plus one tool. Support the panel's weight while you release it; a dropped dish is a dead dish.
- Cap the connector. A bag and tape is enough. Water inside a Starlink connector does not dry out into a working connector, it dries out into a corroded one.
- Plug the wall penetration. The step everyone forgets. The cable hole is now a hole into the wall cavity, and hurricane rain arrives horizontally. Sealant plus a plug beats a wet wall, and the cable management guide covers what to do with the run itself.
- Photograph the plate, the fasteners and where they bit. This takes thirty seconds and is worth more than the rest of the list if the storm is bad, for reasons covered below.
After the storm: a mount that survived is not proven
A bracket still hanging on a wall has passed a visual test, not a load test. Steel that took a near-yield load and screws that were pulled past their preload lose something in the process, and none of it is visible from the ground. The inspection is a ladder and ten minutes.
- Re-torque every fastener. A screw that turns freely by more than a quarter turn lost preload in the storm and will keep losing it.
- Look for elongated holes and rust weep. An oval hole with a rust streak under it is the fastener moving, which is the failure mode from earlier in this page caught in progress.
- Look at the sealant, not the bracket. A hairline crack in a bead is a leak that shows up in the ceiling in three months, in the season when you are least likely to connect it back to the storm.
- Look at the dish's aim, not its power light. A terminal that connects but underperforms after a storm has usually slipped a few degrees rather than lost a radio - that is the ten-minute diagnostic, and it costs nothing to run.
- Run the obstruction check after the leaves are down. Not during the event, when rain on the panel gives you nonsense readings, and not before, when the tree that is about to lose a limb is still standing.
The thing that actually takes you offline is the power
After Hurricane Ian, the terminals that stayed up in the worst-hit areas tended to have two things in common: power behind them, and a mount that was bolted to something structural. The failures were dominated by mains power at the premises and by lightly attached roof brackets - not by the dish, and not by the satellite side. That is a pattern worth internalising before the season rather than during it.
A Starlink system draws somewhere in the region of 40-75 W in normal operation, which is small enough to be carried by ordinary household backup and large enough that a phone battery is not going to do it. As a rough guide, a 500 Wh power station is good for most of a working day, and 1 kWh gets you through one. Anything that must not drop should also have a cellular fallback, because a dish in a rain band is not a guaranteed link. The off-grid power guide works through the arithmetic properly.
The sentence in the terms nobody reads
Starlink's limited warranty excludes damage resulting from "fire, flood, wind, lightning, earthquake, weather, or other acts of nature or God". Wind is named, in a list, in the contract. So a dish that goes over the fence in a named storm is not a warranty conversation and never will be - it is a property claim on your own policy, subject to your deductible, and a deductible is frequently larger than the dish.
That is why the photograph in step six exists. When a claim is assessed, the question behind the question is whether the thing was installed properly, and a picture of six fasteners biting into framing, taken before the storm, answers it in a way that no receipt can. It is also the reason this page will not use the phrase "hurricane proof", and the reason we would be suspicious of any mount that does.
Our line, plainly
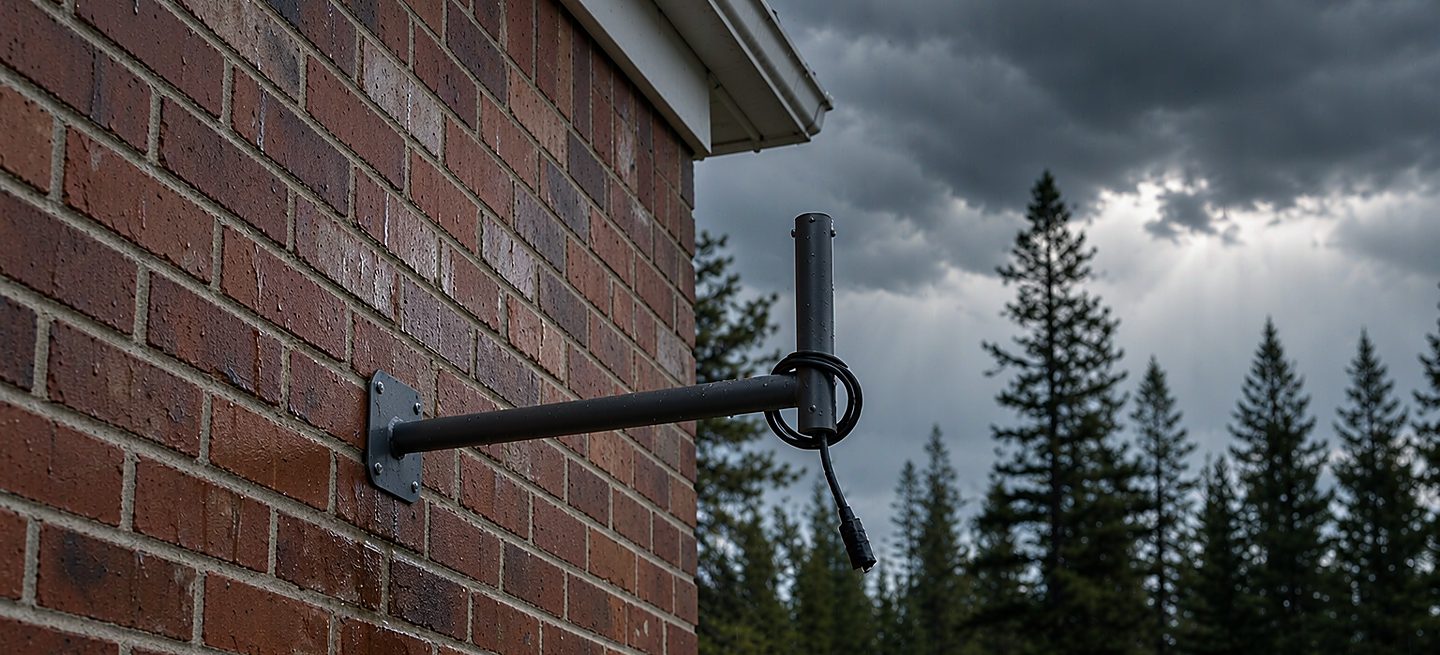
The wall bracket is a steel plate with six anchor points, an 11 inch arm and a mast that takes the dish's 1.5 inch thread directly. Two of those features matter here and neither is the arm. The six points spread across two rows are what turn the moment from the arm into a manageable pull per fastener - one row of three would be a hinge. And the 11 inch arm exists to get the panel clear of siding, trim and gutter, not to make anything stronger: every inch of reach adds moment, so we would rather sell you clearance than imply strength.
What we cannot do is rate it for a hurricane, and no competitor can either. What you can do is install it where the fasteners reach framing, keep it somewhere you can reach with a ladder, and take the dish off when the forecast says so. The best storm feature on any mount is that you can get to it in twenty minutes. If your roof does not allow that, the honest answer may be a ground mount you can walk up to - or a dish that comes in the house with you.
FAQ
Should I take my Starlink dish down for a hurricane?
If sustained winds above about 60 mph are forecast, yes - take the dish and mast off and leave the through-bolted plate on the wall. The plate has almost no windage, the holes are already sealed, and the dish is the part that turns a bracket into a sail. Under 60 mph, an install fixed into framing is normally fine; inspect it afterwards either way.
Can a Starlink dish survive 100 mph winds?
SpaceX does not publish a consistent survivable-wind figure for the standard residential kit, so the honest answer is that nobody can promise it. The 170 mph number that circulates belongs to the flat high-performance terminal, which is different hardware. Check the specification page for the exact kit you own before planning around any number.
Will my homeowners insurance cover a dish that blew off?
Usually as storm damage under the property section, subject to your deductible - but Starlink's own warranty explicitly excludes wind, weather and acts of nature, so the manufacturer is not the route. Photograph the install before the season: photos of fasteners biting into framing are what settle the question of whether it was installed properly.
Do I have to remove the whole mount, or just the dish?
Just the dish and mast, in most cases. A bare plate bolted to a wall or roof presents a tiny frontal area and is far safer left in place than removed and refitted in a hurry - every refit means new sealant and a fresh chance to miss the framing. Remove the plate only if the wall itself is at risk.
What should I do with the cable and the hole in the wall?
Cap the connector, then plug the penetration. A cable hole is a direct path into the wall cavity and hurricane rain arrives horizontally, so a dab of exterior sealant plus a plug is the difference between a dry wall and a wet one. Coil the cable indoors rather than leaving it hanging outside to whip.
How do I know if the mount was damaged after a storm?
Four checks on a ladder: re-torque every fastener, look for elongated holes with rust weep under them, look at the sealant bead for cracks, and look at the dish's aim rather than its power light. A terminal that connects but underperforms after a storm has usually slipped a few degrees, not lost a radio.
Is a tripod safer than a wall mount in a storm?
A tripod is easier to take in, which is most of the argument for it during storm season - there is nothing to unbolt and nothing to reseal. But left out, ballast resists tipping rather than sliding, and a bare stand in a named storm is a projectile. If the season is active, plan to bring the dish in and leave the empty stand staked.
Can I leave a Starlink dish up through hurricane season?
Many people do, and most of them get away with it. The ones who do not are usually on sheathing-only fixings, a fascia board, or lap siding - surfaces that were never carrying structural load. If the plate is bolted into rafters or studs, leaving it up is a reasonable risk; if you cannot say what it is bolted into, that is the answer.
Wall Bracket
Six anchor points across two rows to spread the storm moment, and 11 inches of clearance so the dish sits clear of the siding, the trim and the gutter.