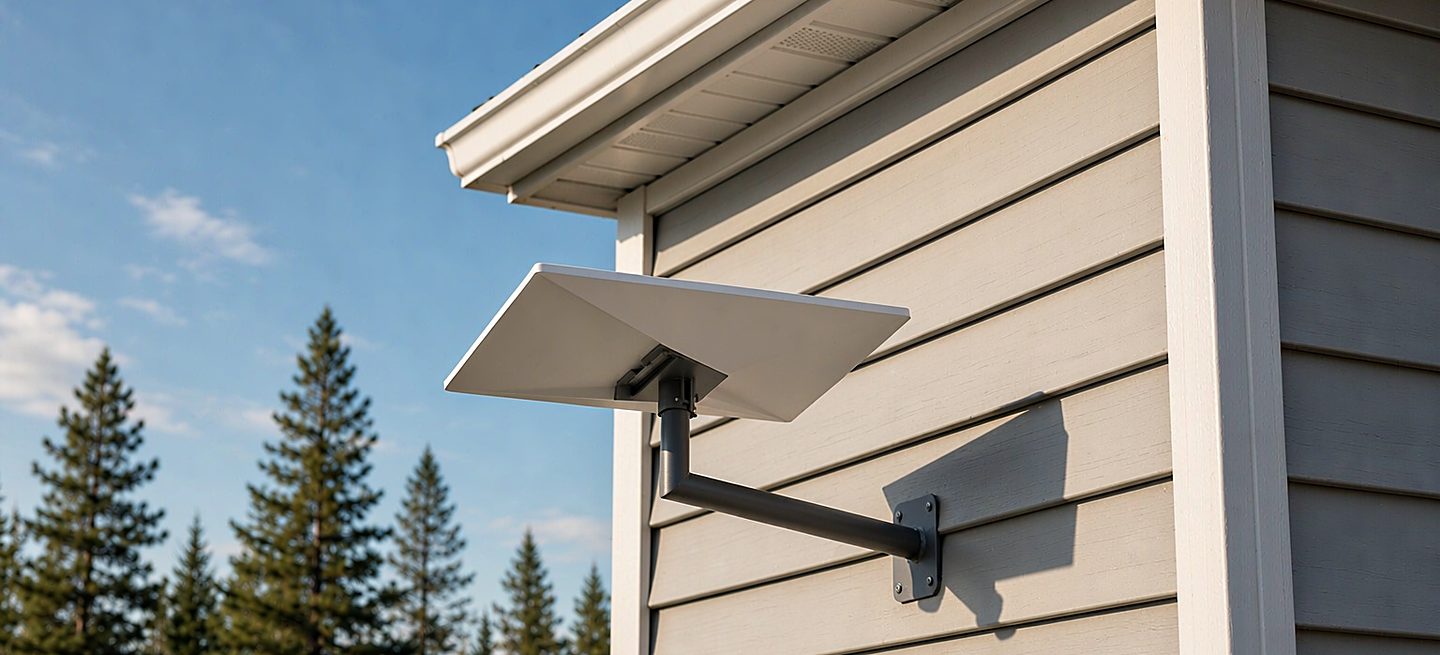
Short version: on a sided wall the surface you are looking at is not the wall. Vinyl, aluminum and wood clapboard are rain screens hung over sheathing - built to move, built to let water drain behind themselves, and built to carry nothing. A Starlink bracket has to reach the framing behind the skin, land on something flat rather than on a lap, and seal two holes instead of one. Reaching framing is a measuring job on most houses. Where there is no framing at the dish's position, the eave or the ground is a better answer than a longer screw.
This is the most common wall on the continent and the one people describe most wrongly. "It is only siding, so it will be easy" and "it is only siding, so I need a contractor" are both half true. The skin is flimsy. What is behind it is an ordinary framed wall that will happily carry a bracket - once you stop treating the part you can see as the part that holds.
Three layers, and only the back one carries load
A sided wall is a stack, and the layers have completely different jobs. Knowing which one you are drilling into is the whole install.
- The skin. Vinyl panels, aluminum sheet, wood clapboard or fibre cement. It laps, it hangs, it moves with temperature, and it sheds the bulk of the water. Its fixings are designed to let it slide, which tells you how much load it is expected to take.
- The drainage plane. Housewrap or building paper behind the skin. Its job is to let anything that gets past the lap run down and out at the bottom. Nothing structural is ever fixed to it.
- Sheathing and studs. Half-inch oriented strand board or plywood over studs at 16 or 24 inch centres. This is the only layer in the stack that is meant to hold anything.
So the fixing has to pass the first two layers and land in the third. Siding makers say exactly this in their own installation literature, and a mount bracket does not get an exemption: an anchor that stops in the skin is holding a panel that was designed to float, and the first sustained wind is the test it fails.
Why the plate cannot sit on a lap
Almost every siding failure we see in photos is the same detail: a flat mounting plate bolted down over the laps. It fails in three ways at once.
It rocks. A lap is a step, not a surface. The plate touches the high edge at the top and the low edge at the bottom with a void in between, so when the top bolts are tightened the plate pivots until it beds, and the fixing nearest the void ends up carrying the whole tension. On an 11 inch arm that fixing has the dish's wind load to resist on its own.
It crushes what it clamps. Vinyl is a hollow shell with a nailing hem; clamp it flat and the panel deflects under the plate, and in cold weather it can crack instead. Foam-backed vinyl is worse, because the foam creeps: the joint feels tight on the day and has lost its preload by the following spring.
It dams the drainage. A lap is a watershed. Caulk a plate across it and the panel above now sheds onto a sealed edge, so the water takes the only route left - the bolt holes you just drilled.
The fix is a flat landing, and there are three honest ways to get one. Put the plate on a flat trim board that is already nailed to framing - a corner board, a gable rake board, a frieze. Or use a rigid pad that bridges the laps and bears on a stud, so the panel is not compressed at all. Or clear a single plane across the plate's footprint and flash the top edge of the plate like a sill, so water is directed over it instead of into it. What does not work is a plastic fixture block sold for garden lights and hose bibs: those are rated for a pound and a flat back, and this is a lever with a dish on the end of it.
What 11 inches of reach buys, and what it does not
Our wall bracket puts the dish 11 inches out from the wall face. That number is not styling. A sided wall accumulates depth in front of the framing: a vinyl double-4 lap is roughly three quarters of an inch to an inch of profile, wood clapboard about three quarters, fibre cement five sixteenths to seven sixteenths, a frieze or band another three quarters, and a gutter four to six inches off the fascia. Add them up and a dish mounted flush against the face is sitting in a slot between the wall and the gutter, looking at the wall's own bump.
Reach also moves the bracket's plate down the wall, where there is usually a flatter run of siding than at the corner it has to clear. That is the practical half of the argument.
The other half is the one people skip: reach does not add strength. An arm converts the wind's push on the dish into a moment at the plate - the top fixings go into tension, the bottom ones into compression - and the moment grows with the distance from the wall. Every extra inch of reach is extra pull on the same six holes. So a longer bracket is never a fix for a weak fixing; it only changes which part lets go first. Reach is measured from the wall face, but the fixing is measured into the stud, and only the second number decides whether the install stays up.
Five skins, five different mistakes
| Skin | How it behaves | What the fixing must do | How this one fails |
|---|---|---|---|
| Vinyl, standard | Hangs loose in slotted nailing hem, moves with temperature, hollow behind | Lag through a clearance hole into a stud; plate bears on a flat pad | Bolted tight, so the panel cannot slide - it buckles, then cracks at a hole |
| Vinyl, foam-backed | Same panel with insulation glued to the back that compresses under load | Longer fixing plus a rigid spacer that reaches framing without clamping the foam | Preload disappears as the foam creeps, and the plate works loose in a season |
| Aluminum | Thin sheet over sheathing; dents and oil-cans when pressed | Fix into framing, with a washer or backer so the sheet is not crushed | Fastened to the sheet alone - holds for a year, then peels off in a storm |
| Wood clapboard | Three-quarter profile, moves with moisture, splits along the grain | Pilot drill, fix into studs, set the head flush rather than sunk | Driven into the thin top edge of a lap, or trusted as if a board were structure |
| Fibre cement | Rigid, heavy, brittle, moves very little | Pre-drill, hand-tighten, carbide bit, dust mask | Impact driver over-torques the sheet and a corner breaks away around the plate |
One skin is missing from that table on purpose: stucco over foam, which is not a siding problem but a backup problem, and it has its own page. The masonry guide covers the walls where the anchor itself is the question rather than the reach.
Finding framing behind a closed wall
You do not need to know the wall is framed at 16 inches on centre; you need to know where two studs are within the plate's footprint. In order of reliability:
- From the inside. An unfinished basement, a garage, an attic, or the back of a closet will show the studs directly. Measure from a feature you can see from both sides - a window, a service entry, the corner of the foundation - and transfer the numbers outside.
- A magnetic stud finder. It finds the nails rather than the density, so it works through vinyl, aluminum and clapboard that a capacitive unit cannot read over a foil-faced foam layer or an air gap.
- The grid. Once one stud is confirmed, the rest are at 16 or 24 inch intervals. Confirm the next one with a 1/8 inch bit in a spot the plate will cover.
- Trim. Corner boards, gable rake boards and friezes are nailed into framing and are flat by design. On a lot of houses the cleanest landing for a plate is not siding at all - it is the corner.
Two things not to trust: sheathing on its own, which will hold a shelf but not a lever, and the "it feels solid here" test on a lap, which mostly tells you the panel is cold.
Two holes, and the inner one is the one that leaks
A bracket on siding means two penetrations per fixing line, and they want opposite treatment. The hole through the skin should be a clearance hole - slightly oversized, so the fastener does not pinch the panel and the panel keeps its freedom to slide. The hole through the sheathing and the drainage plane is the one that lets water into the house, and it is the one people seal last or not at all.
Drill slightly downhill to the outside so any water that reaches the hole runs out rather than in, put a bead of sealant around the fastener at the sheathing, and run the dish cable with a drip loop below the entry so the jacket sheds instead of wicking. Use a sealant rated for the siding you have - some solvent-based products attack vinyl, and the tube's label is a better authority than the colour match - and never seal the bottom edge of a lap, because that edge is the drain.
Cold weather is when the skin breaks
Vinyl turns brittle below about 40 degrees Fahrenheit, which is why siding crews avoid cutting it on a cold morning. A plate torqued down on a cold panel, or a panel flexed while you push a fastener through, cracks - and the crack starts at the nearest hole. Drill at low speed with a sharp bit, snug the fasteners by hand rather than with an impact driver, and if the job can wait for a mild day, let it: the winter install guide covers the rest of what changes below freezing, from sealant cure times to ice underfoot.
When the wall says no
The decision is usually about the footprint rather than the wall. If the plate lands on two studs, a sided wall is a good wall, whatever the skin is.
| Situation | Will it carry an 11 inch arm? | What to do |
|---|---|---|
| Studs behind the skin at the plate's footprint | Yes, on any of the five skins | Long fixings through clearance holes, flat pad over the laps |
| Foam-backed vinyl over studs | Yes, if nothing clamps the foam | Rigid spacer to framing; do not compress the panel |
| Siding over sheathing only, no stud where the plate goes | No | Shift the plate along the wall until it finds two studs, or move to a corner or gable board |
| EIFS, or stucco over foam, with no framing behind the footprint | No | Reach framing with a long standoff, or change position - foam render will not take the anchor |
| Single-storey wall that cannot clear the roofline even at 11 inches | Yes, but the view fails | Eave or fascia instead, or a ground pole - see what each fixing reaches |
| Rented, or drilling is not allowed | Not applicable | A freestanding stand needs no penetration at all - the no-drill options |
The order that avoids rework
Every one of these steps is cheap before the first hole and expensive after it.
- Check the view first, from the height and the side you intend to use, with the dish tilted the way it will hang. The obstruction guide explains why a metre of height changes the answer.
- Find two studs within the plate footprint, from inside if you can, with a magnet and a pilot bit if you cannot.
- Build the landing - the flat pad, the trim board, or the flashed plane - before any fastener goes in.
- Size the fasteners by measurement, not by the packet: they must cross the skin, the air gap and the sheathing, and still bite an inch and a half into the stud.
- Seal both holes the same day, and hang the cable with a drip loop.
- Re-check the plate after a week and after the first hard wind. A joint that has lost preload announces itself as a faint rattle at the plate, long before it lets go.
Do this and the siding stops being the weak point. The wall was never the problem - the part in front of it was.
FAQ
Can I mount a Starlink dish on vinyl siding?
Not to the siding itself. Vinyl panels hang loose in slotted nail hems so they can move, and they are designed to shed water rather than carry load, so a bracket fixed to a panel is fixed to the one part of the wall that was never meant to hold anything. The bracket has to pass through the skin, the drainage plane and the sheathing and land in a stud, with the panel free to slide under the plate.
Do I have to remove siding panels to mount the bracket?
No. You drill a clearance hole through the skin - slightly oversized so the panel is not pinched - then a pilot hole into the stud behind it. Removing panels is only worth it if you cannot find framing any other way, and on most houses a magnetic stud finder plus a look from the inside gets you there without disturbing the wall.
How do I find studs behind vinyl or aluminum siding?
Three ways that work: look from the inside in a basement, garage or attic and measure across from a window or the corner; use a magnetic finder, which locates the nails and is not confused by an air gap or foil-faced foam the way a capacitive one is; or find one stud and count the 16 or 24 inch grid from it, confirming with a 1/8 inch bit. Corner boards and gable rake boards are nailed to framing and are often the easiest landing on the house.
Will the bracket crack or dent my siding?
Only if it is clamped onto a lap. A plate bridging the laps touches two edges and a void, so tightening the top fixings rocks it and crushes the panel under one side; in cold weather that crush becomes a crack. A flat pad that bridges the laps without compressing the panel, plus an oversized clearance hole, removes both problems.
Is a sided wall as strong as brick for a Starlink mount?
Usually stronger at the fixing point, because the bracket lands in a stud rather than in a mortar joint or a veneer skin. The difficulty on siding is reach, not strength: you need long enough fixings to cross the skin and the air gap, and a flat landing over the laps. A brick veneer wall has the opposite problem - the face looks solid but the only thing holding is the frame behind a one inch cavity.
What about foam-backed vinyl siding?
It can work, as long as nothing clamps the foam. Insulation glued to the back of the panel compresses and then creeps, so a plate bolted down onto it feels tight on the day and has lost its preload within a season. Use a rigid spacer that reaches the framing, and size the fastener for the extra thickness rather than the visible wall.
Can I mount on aluminum siding without denting it?
Yes, if the fastener goes into framing and the sheet is supported where it is compressed. Aluminum is a thin skin over sheathing, so over-tightening oil-cans it around the washer and the dent becomes the start of a leak path. Fix to the stud, use a washer or small backer to spread the load, and stop when the sheet is just in contact.
What if there is no stud where the dish needs to be?
Move the plate, not the anchor. A plate shifted along the wall by a few inches will usually find two studs, and a corner board or gable rake board is framing with a flat face on it. If neither works, change the position type - eave or fascia, a ground pole, or a freestanding stand that needs no penetration at all. Long anchors into sheathing are not a substitute for framing.
Wall Bracket
Six anchor points and 11 inches of reach, so the plate lands on a flat run of wall and the dish clears the siding, the trim and the gutter.